Developer Guide
Technologies Used
If you are thinking about helping out with Starbelly development, it will be useful to familiarize yourself with the different components and technologies being used:
Setting Up Dev Environment
In a typical dev environment, you will need to run the following components:
- Starbelly Server (on your localhost)
- Starbelly Web Client (on your localhost)
- RethinkDB Database Server (in Docker)
- Nginx Web Server (in Docker)
To set up this environment, you will need the following prerequisites:
- Docker
- Poetry
- Chromium or Chrome (optional, but they are the only officially supported browsers for Dart development)
- Dart SDK 2.7.1
After installing the Dart SDK, install webdev:
$ pub global activate webdev 2.5.4
This specific version of webdev works best with our dev environment.
Clone the following repositories:
- Starbelly server:
git clone https://github.com/hyperiongray/starbelly - Starbelly client:
git clone https://github.com/hyperiongray/starbelly-web-client
Before the first run, create a self-signed certificate:
- Go into the
starbelly/directory and install the server’s dependencies:poetry install. - Go into the
starbelly/dev/directory and runpoetry run python gencert.py localhostto create a self-signed certificate.
Run the Docker containers:
- Go to the
starbelly/dev/directory and rundocker-compose upto start the Docker containers.
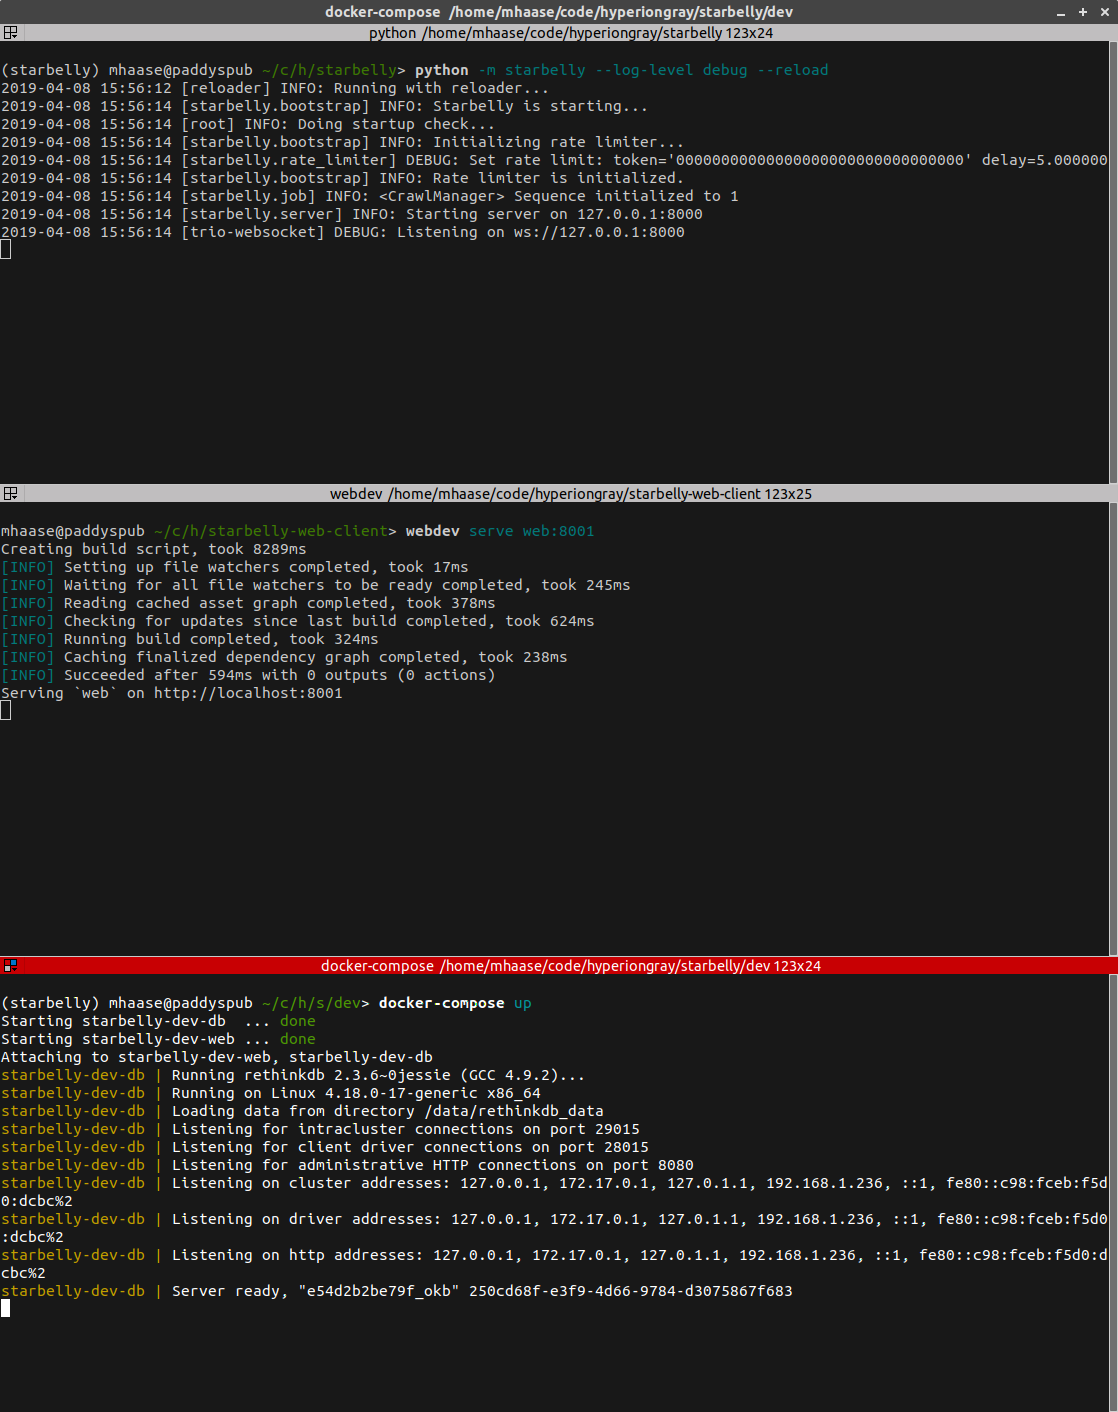
In a second terminal, run the Starbelly server:
- Go to the
starbelly/directory and start a new shell:poetry shell. - Run the container initialization script:
python tools/container_init.py. - Start the application server:
python -m starbelly --log-level debug --reload.
In a third terminal run the web client’s build server:
- Go into to the
starbelly-web-client/directory and run pub get. - Run:
webdev serve web:8081 --auto=restart. (This step takes 15-20 seconds.)
If all has gone well, your terminal should look something like this:
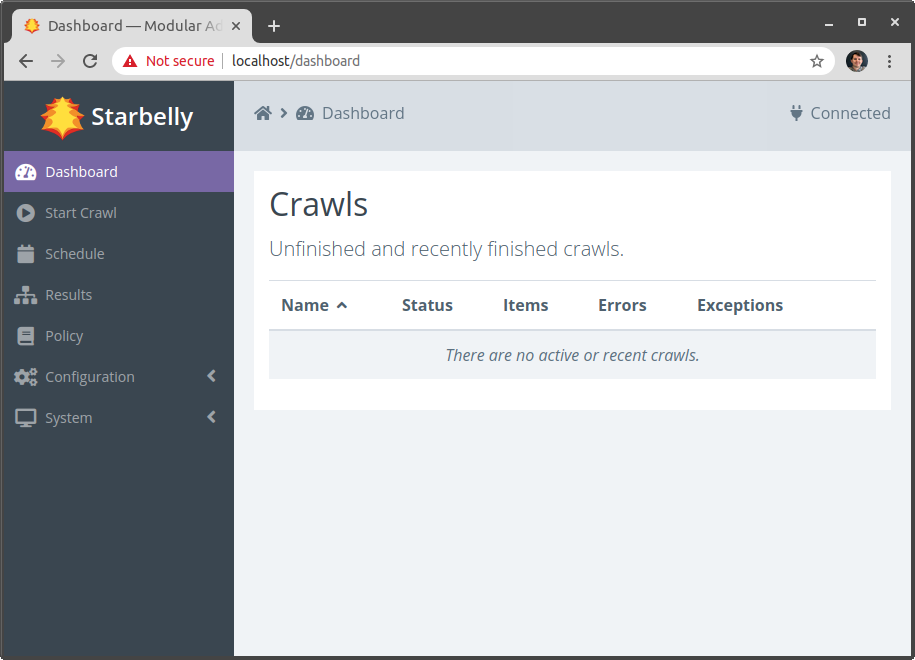
Now you can navigate to https://localhost to view the application in your
browser (Chromium, as mentioned above).
To improve debugging, you should make one small configuration change in Chromium. In the web inspector, click the gear icon in the top right corner, and then tick the box labeled “Enable custom formatters”. This will allow you to view native Dart objects in the web inspector.
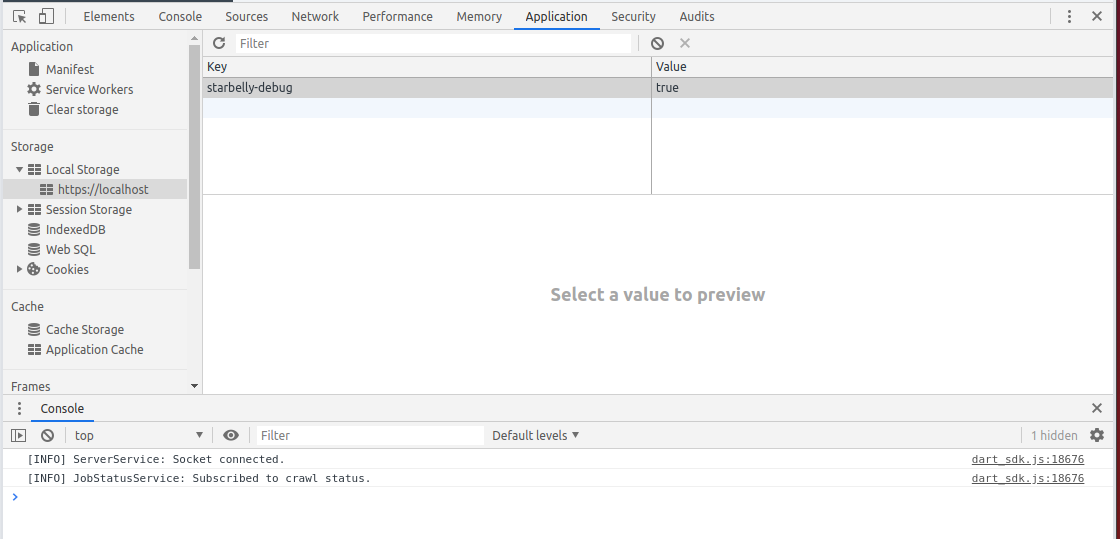
You should also set up client-side logging by going into the web inspector,
clicking “Application” → “Local Storage” → “https://localhost” and adding a new
key named starbelly-debug with the value true. Refresh the page and you
should see some log messages in the browser console.
You now have the following services running:
| Service | Ports |
|---|---|
| Nginx | 80 (redirect), 443 |
| RethinkDB | 8080 (GUI), 28015 (API) |
| Starbelly Server | 8000 |
| Dart Server | 8001 |
The only ports you will typically need to use are the Nginx on 443 and RethinkDB on 8080.
Common Tasks
As you start working on Starbelly code, you’ll encounter some common tasks that you wish to perform. In the examples below, if a command prompt is prefixed with a container name, then that indicates that the command must be run inside a specific Docker container. For example, if you see this:
starbelly-dev-app:/starbelly# ls /usr/local/etc
jupyter
Then that command should be run inside of the starbelly-dev-app container.
To obtain a shell inside that container, run:
$ docker exec -it starbelly-dev-app /bin/bash
starbelly-dev-app#
You can use the same technique to get a shell inside the starbelly-dev-db or
starbelly-dev-web containers.
Build Documentation
This documentation that you are reading is written in RestructuredText format
and stored in the main starbelly repo under /docs.
starbelly-dev-app:/starbelly/docs# make docs
Running Sphinx v1.7.1
loading pickled environment... done
building [mo]: targets for 0 po files that are out of date
building [html]: targets for 0 source files that are out of date
updating environment: 0 added, 0 changed, 0 removed
looking for now-outdated files... none found
no targets are out of date.
build succeeded.
To view the documentation, use your web browser to navigate to
starbelly/docs/_build/html/index.html.
Clear Database
See the Administrator Guide.
Database Query
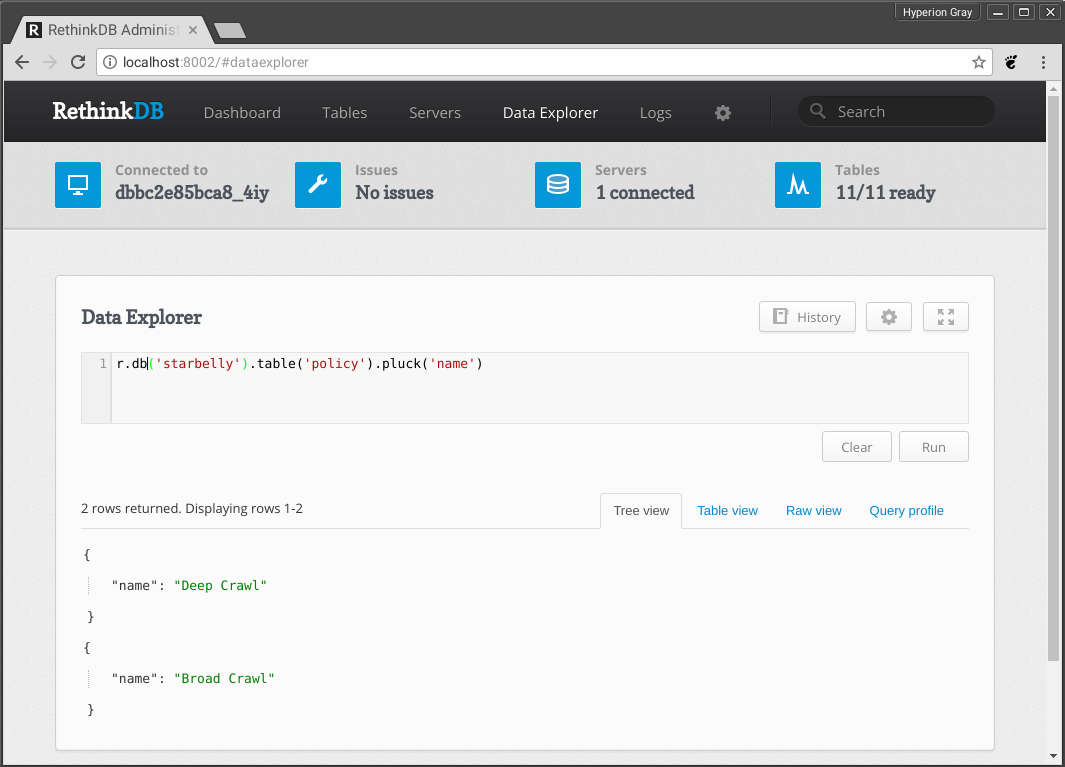
There are two ways to run RethinkDB queries. The easiest way is to access the RethinkDB GUI on port 8002 using your browser. You can browse lots of information about the database or use the “Data Explorer” to run queries. Note that this interface only allows JavaScript queries, so if you are trying to troubleshoot a Python query you will need to translate it into JavaScript.
If you want to run a query using the Python API, you can use the Starbelly shell instead.
Starbelly Shell
The Starbelly shell offers an interpreter with quick access to Starbelly’s internal API, and it is a good place to debug little bits of code. The shell cannot directly access the server’s internal state at runtime, but it is useful for things like inspecting config files or running ad hoc database queries.
$ python tools/shell.py
IPython Shell: Starbelly v2.0.0
In [1]:
The shell initializes some global variables and then presents you with an
IPython prompt. You can access the config and
logger objects here.
In [1]: config['database']['user']
Out[1]: 'starbelly-app'

In [2]: logger.info('Hello, world!')
12:52:17 [tools.shell] INFO: Hello, world!
The shell imports the trio package for you and is setup to handle async
functions. The following snippet defines an async function and shows two
equivalent ways of running it.
In [3]: async def foo(): await trio.sleep(1)

In [4]: await foo()

In [5]: trio.run(foo)
You can also run a query and display the results.
In [6]: policy_query = r.table('policy').pluck('name')

In [7]: policy_results = run_query(policy_query)

In [8]: print_results(policy_results)
RethinkDB Cursor: [
    {'name': 'Deep Crawl'},
    {'name': 'Broad Crawl'},
]
Warning
Printing the results of a query will exhaust the cursor object! If you try to do anything else with the cursor, you will find that it has no more data. You need to run the query again to get a new cursor.
Jupyter Notebook
The Starbelly shell is also compatible with Jupyter Notebook, which may be a
more user-friendly way to access the shell. If you haven’t used it before,
Jupyter Notebook is a great way to experiment and prototype code. (The
notebooks directory of the repository contains some examples that you can
view directly on GitHub.)
If you haven’t installed Jupyter before, you’ll need to install it. (It is not installed with the Starbelly developer installation.) It does not need to be installed within the virtual environment. In fact, if you want to use it with other projects, it works quite well installed into your global Python packages. It can be installed with Python 2 or 3, but we recommend Python 3.
$ sudo pip3 -H install jupyter
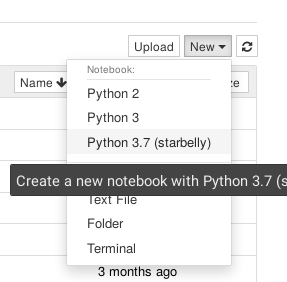
You will want to make sure that you have a Python 3.7 IPython kernel installed. Run the following command inside your virtual environment
(starbelly) $ python -m ipykernel install --user --name starbelly \
                     --display-name "Python 3.7 (starbelly)"
After doing this one-time step, you can start a notebook server by running the following command from the project root.
(starbelly) $ jupyter notebook
[I 12:58:37.849 NotebookApp] Serving notebooks from local directory: /home/mhaase/code/starbelly
[I 12:58:37.849 NotebookApp] The Jupyter Notebook is running at:
[I 12:58:37.849 NotebookApp] http://localhost:8888/?token=d607f8171694c628db8e7877570e4968f59267120fb49c3e
[I 12:58:37.849 NotebookApp] Use Control-C to stop this server and shut down all kernels (twice to skip confirmation).
[C 12:58:37.874 NotebookApp]
Now access the Jupyter server by going to localhost:8888 in your browser. If you installed the IPython kernel correctly, you should see a “Python 3.7 (starbelly)” option when you go to create a new notebook. You should choose this option when you wish to interact with the Starbelly shell.
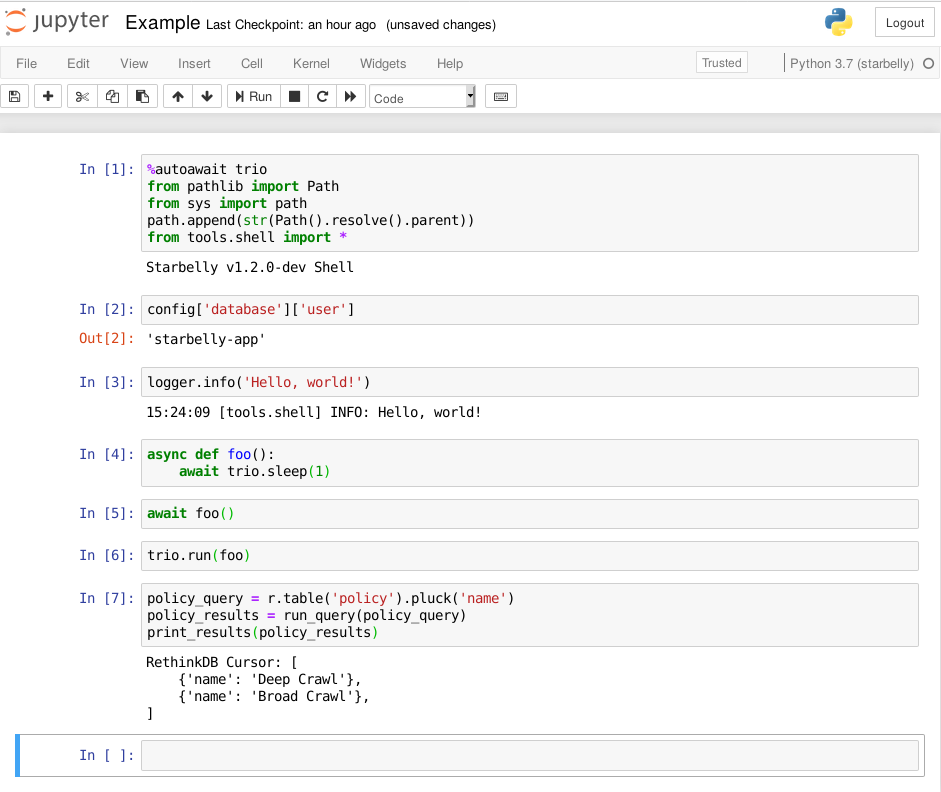
In the first cell of your new notebook, you should run the following commands:
%autoawait trio
from pathlib import Path
from sys import path
path.append(str(Path().resolve().parent))
from tools.shell import *
These commands assume that you create your notebook in the notebooks
directory, so you may need to adjust if you create them elsewhere. After that,
you have access to everything in the IPython shell described above.